Divetalking » Training » Uwatec Tec – Setting the O2
Uwatec Tec – Setting the O2
Use of computers is becoming more common every day. First think I have to offer you is RTFM. Read The Friendly Manual. Know how your computer works. Ask for help and understanding. It’s faster than readying, right? 🙂
I use Uwatec (scubapro) wrist mounted computers. I own three and use the Uwatec Tec as my primary. Here, I will walk you through the menus of this computer. I feel once you see what I have to show, you’ll get it. Understanding the menuing system on the Tec is Easy. It’s really a matter of remembering what their for and how to use them.
Let’s get started.
First, Let’s look at the mechanics that allow you to navigate through the menus.
Contacts. There are FOUR contacts on the Uwatec tec. Three are found at the top and one on the bottom right. They look like silver buttons. The picture below shows the contacts marked as – + E B.
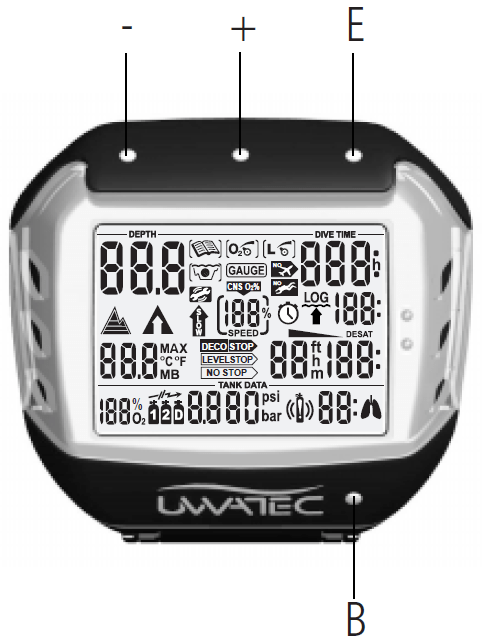
Here is the key to the meaning of – + E and B Contacts, think of the – and + as left (–) and right (+). An example, while the Thumb is in contact with Contact B, pressing Contact – moves Left across the menu, B – . To move Right along the menu, B +.
Here is a map of the menu
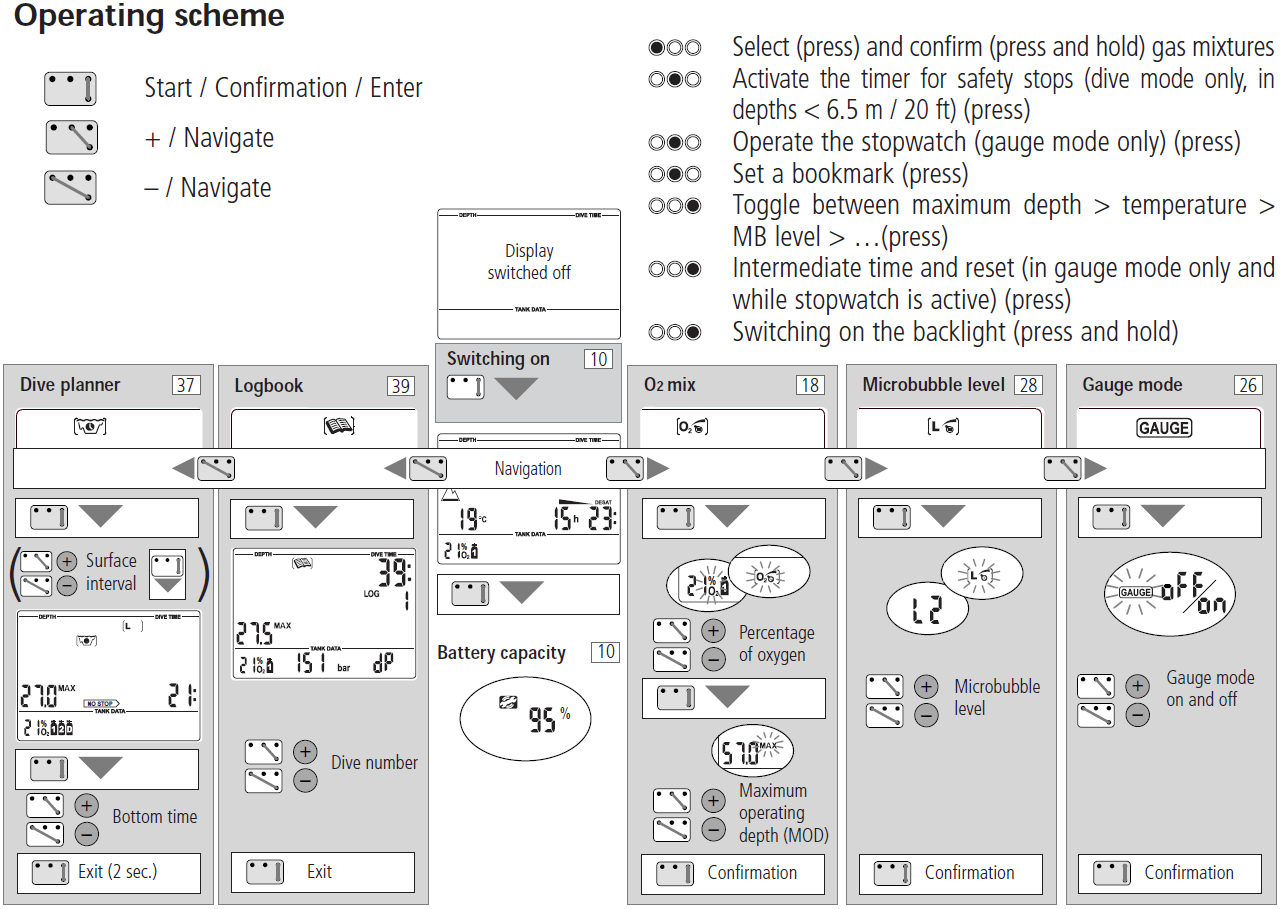
Looking at the picture above, there are two menus to the left of center and three to the right. What I am calling center is the column showing Display switched off, Switching on, Battery capacity. At this point your dive computer should be turned off, if not it should be at its Main Menu and will return to the Main Menu after about 30 seconds if no action is being taken by you.
The two menus to the left of center are Logbook and Dive Planner.
The three menus to the right of center are O2 mix, Microbubble Level and Gauge mode. So there are only 5 menus moving left to right, Dive Planner, Logbook, O2 mix, Microbubble Level and Guage mode.
How to turn the Uwatec Tec computer on. There are two ways, one, place it in water or two, wet your fingers before making contact with the contacts. The contacts on the computer are wet contacts. They work when a conduit is created to act as a means to move energy, a current.
So wet your thumb and place it on the bottom contact, contact B, while wetting another finger and touching contact E. Think of contact E as the Enter key. While the B contact is Base. You must alway remain in contact with contact B (thumb) then press either -, +, or E depending on what you are intending to perform.
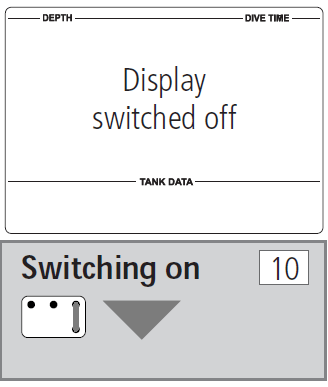
Turning on the computer, you should see  all segments light up for 5 seconds. Then the percentage of battery life is displayed and it waits for your command.
You will be taken to the Main Menu. If there are no prior dive obligations, you will be displayed with the percentage of O2 for the bottle selected and the air/water temperature. If you are of altitude, the computer will display an altitude range. If you have any prior dive obligation(s), they will be displayed as well. For example, O2 toxicity, desaturation time, no fly time
Let’s move to the O2 menu. To navigate RIGHT, you make contact with which two contacts?
If you said B + 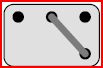 you are correct. The + is the middle contact of the three contacts on the top of the computer. If nothing happened, make sure your finger tips you are using are wet. Licking the end of each finger helps.
Next, make touch both contacts B and E, 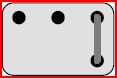
to acknowledges you wish to navigate DOWN, and Enter into the O2 menu.
At this point you moved right along the menu one space ( B +), and down (B E) into the O2 menu.
At the O2 menu, you can set the mix for the bottle you plan to breath the mix from. Note the Uwatec Tec can monitor from three separate cylinders. Make sure you have the correct cylinder selected  when setting your O2. I’ll cover how to select your cylinder later. Just make a mental note to make sure the correct cylinder is selected before setting the O2, 🙂 .
The computer is now waiting for you to adjust the percentage of Oxygen. Pressing B – will decrease the percentage while pressing B + will increase the percentage.  The percent O2 is displayed on the botton left on your screen. You may watch it scrolling up and down while pressing B – or B +.
When the percentage displays the percentage that is in your cylinder, press B E ![]() to confirm your selection. The Maximum Operating Depth, MOD is displayed. It represents the maximum depth with the percent mix you just confirmed. Press
to confirm your selection. The Maximum Operating Depth, MOD is displayed. It represents the maximum depth with the percent mix you just confirmed. Press ![]() once more time to head back to the O2 main menu. Just wait a few and your computer will return to the main display.
once more time to head back to the O2 main menu. Just wait a few and your computer will return to the main display.
Let’s summarize the sequence of events. Turn on the computer, B E, Navigate Right, B + to the O2 menu. B + to Enter into the O2 Menu. Change the O2 Upwards, B + and/or downwards, B -. When happy with your O2 selection, press B E to Confirm. Press B E one more time to accept the MOD.
© 2010, lars2923. All rights reserved.


Written by lars2923
PADI MSDT - I've been a diver for over 33 years. I became an instructor because I want to be creditable and able to transfer my knowledge and skills to newer divers. Beside, it cuts down on the expense of diving. NOT! My Motto: First in, Last out
Filed under: Training